Showing posts with label tips. Show all posts

Monday, April 2, 2012

Dollar Tree Treasure Box!

Earlier today, while suffering through an especially horrendous day at work, I spent some time cruising around one of my favorite online hangouts- the forum at SCRAPBOOK.COM.   On my favorite forum, one of my favorite online scrapbook personalities, Miss Henri, was writing about her family's Easter plans.  In a matter of minutes, I decided that *I* needed an old-fashioned childhood Easter, too!  I quickly e-mailed my Mom with my demands.  On my lunch hour, I ran out to buy some EASTER SUNDAY supplies!

I decided that I would be in charge of table decor and Easter baskets for all of my Easter Sunday participants.  Willing or not, my Mom will hide my (soon to be) beautifully colored eggs and willing or not, my friends will hunt for these eggs!

I headed straight to DOLLAR TREE.  That's right- The Dee Tee!

I bought six baskets, a vase, six chocolate bunnies, and many rolls of ribbon- in different colors- I couldn't decide if all baskets should have the same colored ribbon or if each should be a little different...

While staggering through the aisles, I spotted something- YES!!  One of my favorite things is back in stock at the Dee Tee!

What is it?!

PLAIN.  WOODEN.  BOXES.


I LOVE these things!  Around Christmas, I found lots of them - and once I'd fixed them up a bit, used them to 'wrap' Christmas presents.  I put the present inside, then tied a classy black string around the box.  Very simple, but looked great.  Then, the person got their present AND a nice box they could use to store jewelry, money, or pills or other medicinal/birth control needs.

So how did I fix them up?  With some acrylic paint, scrapbook paper, and some Mod-Podge!

Here's one box that I made for myself.  No, I don't use it to store contraceptives.  Silly.  I use it to hold my spare Cricut blades!


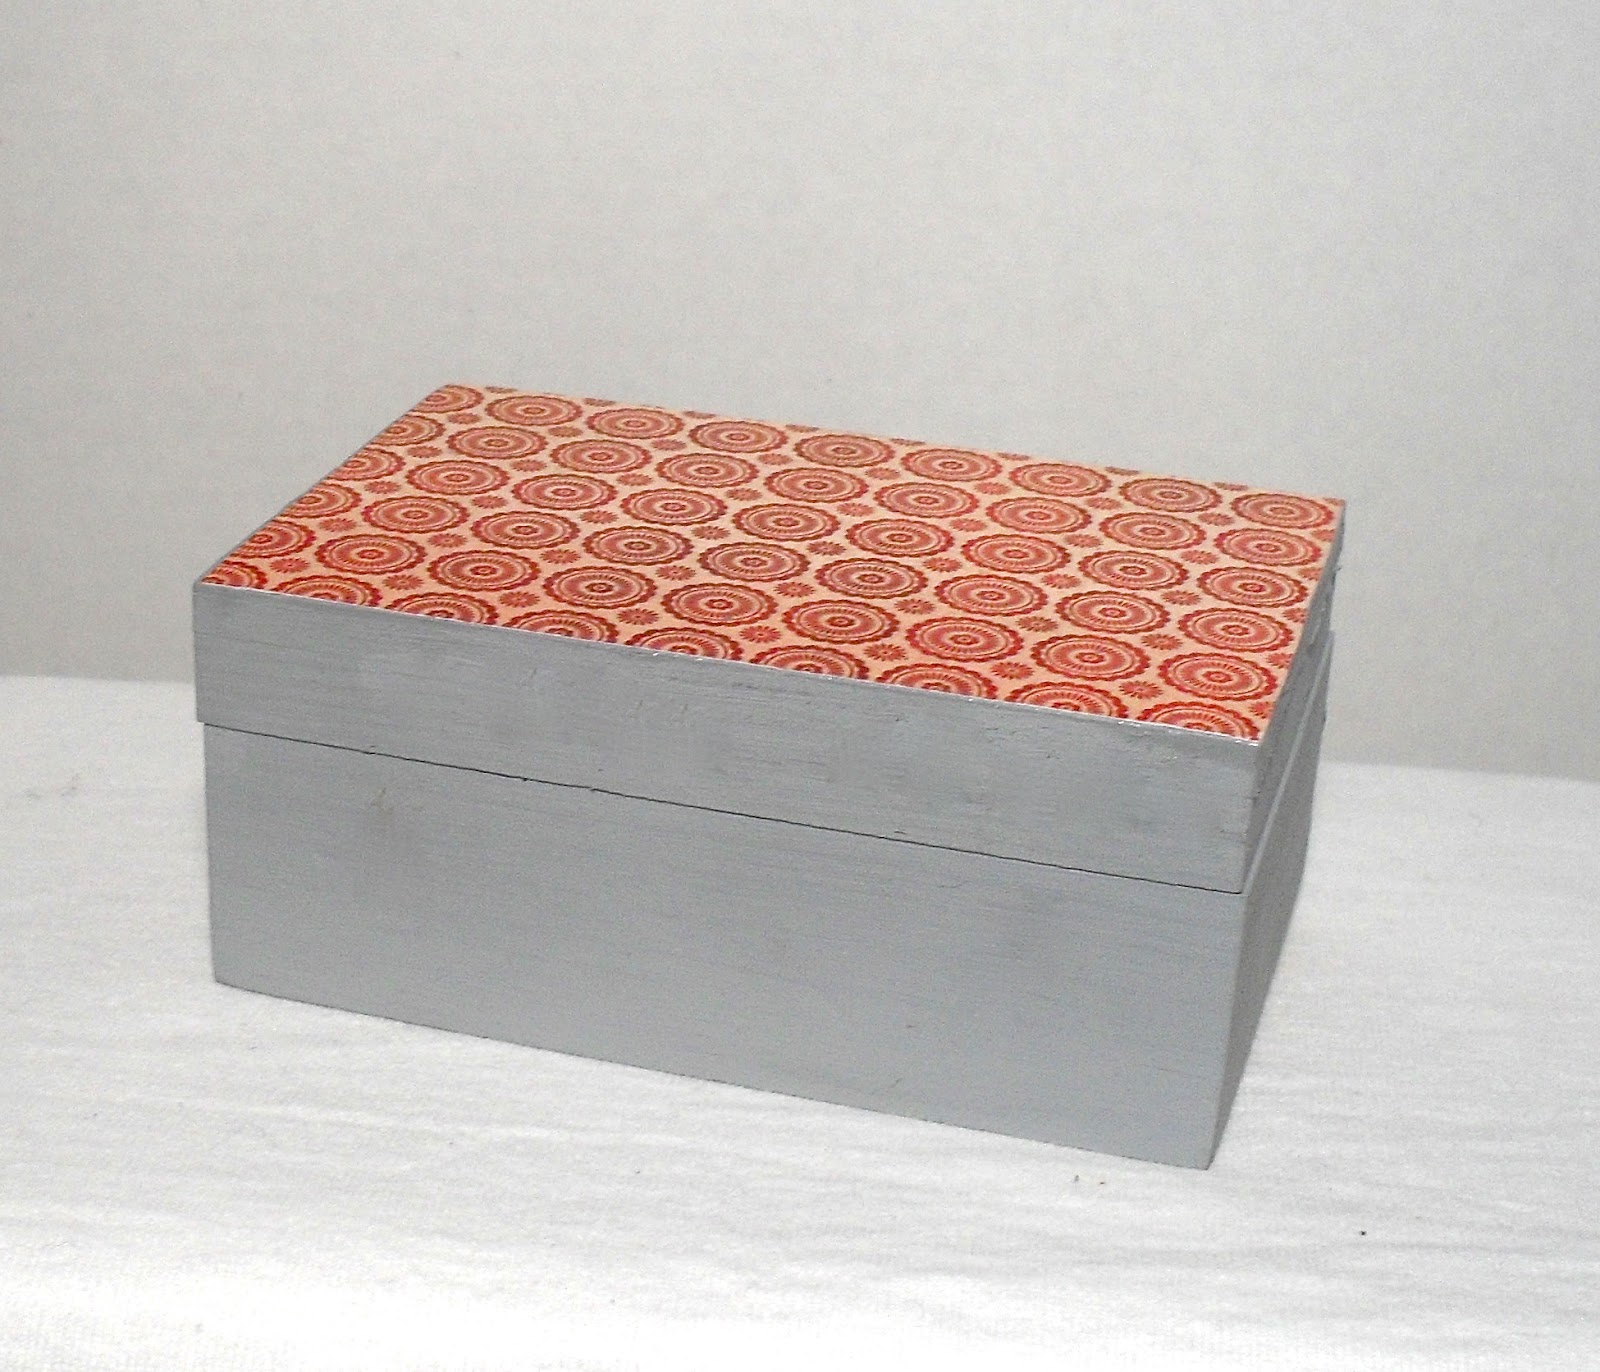
Ain't that purty?  I love that paper from My Mind's Eye.  I need to find more!

Here's another view:


Yeahp.  Cute.  And so cheap.  Dollar for the box, then just a piece of paper from your stash!

I have so much fun making these, that I'm gonna go make another right now!

-kory

Tuesday, March 27, 2012

Tim Holtz Distress Crackle Paint

Who was it, a few days ago, who asked me about the Distress Crackle Paint and if I've had any luck with it?

I've had lots of luck with it-  I don't know what could be causing any troubles you might be experiencing. I've not had any trouble with it- so I've never needed to experiment.  I think that before I bought any, I read something on Mr. Holtz's blog (or saw something on a tip video) that said you should brush it on and not really mess with it once you brush it on-

For example, sometimes when I'm painting something, I have a tendency to keep brushing the paint back and forth and back and forth- trying to smooth it out, trying to make it look just so- and then SURPRISE- parts of the thin layer of paint gets a little dried out and it balls up while the rest streaks with brush lines.   So, I just pull the brush out of the Distress Crackle jar- don't wipe off the excess- you don't want a THIN layer, just make as few strokes as you can with the brush onto whatever you're painting.  One stroke across, then one stroke across right under the last stroke.  Just cover it and, as they say in rehab, LET GO AND LET GOD.

What reminded me of this?  No, not rehab- Crackle Paint.

This:


I'm now at the 'making embellishment' phase of my TOP SECRET SUPER PROJECT.  Which somehow took most of the weekend to make JUST PART OF- and it totally looks like nothing so far.   This could the Al Capone's Vault all over again, people.  Don't be excited.

I painted this Grungeboard wing piece with some ivory acrylic paint, when it was dry, I brushed on some Rock Candy Distress Crackle.  Once that dried, in all it's crackle-ly glory, I rubbed some Walnut Stain Distress Ink on it- ain't it purty?

Anyways.  I need a new job.  Wait, not need.  WANT.  I want a new job.  It's time.  Anybody want to hire a fun guy?  I can type like a mofo.  I've got tons of office skillz, public relations skillz....bow hunting skillz.  I'm good enough with computers that I won't have to call IT every fifteen minutes because I don't know what to click on... any takers?   I don't require much.  Just cocktail hour every Friday at 3, so a place that frowns on drinking at the office would be a bad match.  Let me know,  I'll start Monday.

-kory

Sunday, March 11, 2012

Making Ribbons

Hi there, everyone!

What a weekend.  Yeah?  One thing you know, it's Friday and the next thing you know, it's time to lay out your clothes for work and watch THE WALKING DEAD on TV...

Speaking of work, I'm not gonna be in the mood to get up and go tomorrow.  Why?  Because of the stupidity that is the time change.  I hate Daylight Savings Time time.  My internal clock is screwed up.   I'm gonna be crazy and mean at 8AM tomorrow.  I promise you.

But now- it's time to talk about making ribbon!

Why make ribbon?  And is this really ribbon?  I call it ribbon, so there- it's ribbon.  I've used this on lots of projects.  It adds a great touch, and you can adapt it to make any kind of ribbon 'look.'

First, cut a strip of plain, unbleached muslin.  This stuff is cheap.  And versatile.  And looks good.


One of my favorite things to do, when 'makin ribbon,' is to stamp the muslin. My favorite stamps to use when doing this are Distressing Stamps from Glitz.


Here is the stamped muslin.  Looks cool, doesn't it?  The muslin takes the ink very well.  It looks like the fabric 'came that way!'


Let's look at that close up!


I also like to color the strips with some Distress Stain, then cut it into smaller strips.  Here, I've used some Weathered Wood and Vintage Photo Distress Stains.  I usually mist the fabric with water before applying the stains- it seems to both help the fabric take the stain and gives it more of a worn/streaky look.  Which I like.


I really liked how the strip from the 'numbers' stamp turned out.


I decided to make a few strips without any stamping.  Misted with water, put on some stain.


Wrinkled it up into a ball and dried it with my heat gun.


And SURPRISE!


Cool lookin strip of fabric!

Which I cut into smaller strips and tied to a mini-book that I've been working on for months.  Yeah.  Months.  I keep doing a little bit at a time.


I like how they look on the side of this book, but not sure what else I'll do to them or tie to them or..


So, make some ribbon!

I'm going to relax for a little bit and then try to go to sleep as early as I can, so that I don't feel like too much nasty when I try to drag myself to work.  I think it'll be a Benadryl night.

Oh yeah!  Remember my little contest?  Well, besides from makin' ribbons, I also used one of your ideas and made something with my cool little stamp!  I'll show it to you tomorrow!

-kory

Thursday, February 2, 2012

Paint Chip Party!

WHO doesn't love paint chips?  I understand you might not love them as much as I do- but I'm sure there's a part of your little black heart that loves them even a tiny ounce.  They're COLORFUL.  They're FREE.  What's not to love?  Yes, there have been a few paint-chip-craft related bickering about the ethical concerns with using these 'free' paint chips.  I do not feel it is stealing.  Why?  Because I've asked the people at Home Depot.  That's all you have to do for paint chip crafting with a conscience.  The Home Depot conversation went something like this:

Kory:  Hey, is it okay if I take a few of each color of these ones?
Home Depot Guy:  Yeah, sure.  Take all you want.  I might have a box of some that we picked up on the floor that you could have, if you want.
Kory: Why thank you, you're too kind.  You're going to go far in life!

Yeah, so that isn't verbatim.  But you get the idea of how it went down.

So, again- what's not to love?

Oh, I can think of ONE thing!  The tiny printing that labels the paint chip with it's descriptive information.  But you can get rid of that!  Yes!  An answer to prays!  So what is this little miracle worker? Yeah, it's an eraser.  A 'plastic eraser.'  A WHITE, plastic eraser.  It can be found nearly 'anywhere fine art products are sold.'  (Doesn't that sound like a commercial?  Love it!)  And it's cheap. 

I cannot claim to be the sole originator of this technique.  But there doesn't seem to be much about it, out there- and in a way, I came up with it one my own.  How?  Well, I was sitting at my craft table, thinking.  As I was thinking, I was rubbing my pencil with my thumb.  No, sickos.  'Pencil,' as used in this sentence, is alluding to nothing but an old fashioned No.2 PENCIL.  I glanced down, and saw that I'd rubbed whatever advertising was written on the pencil.  I began thinking, as one does, and wondered if I could somehow 'rub' off the text on a paint chip.  I'm often heartbroken when I find a nice, big, perfectly colored paint chip which I hafta cut up to remove the paint name and product number. 

So, I try a couple of erasers that I had in my craft arsenal.  And it works.  Crazily elated, I dream up all kinds of ideas and feel on top of the world- then I think- I'm not THAT original.  Someone has surely come up with this idea BEFORE.  SURELY, there's plenty of PAINT CHIP PIONEERS who've come up with a way to do this- so I google.  Yeah, it's happened- but not as much coverage as I'd thought.  So here ya go- and check back soon- I'll be sharing some exciting Paint Chip Valentine Crafts!