Tuesday, February 26, 2013

Non-Traditional CraftRoom Storage and Workspace

I really didn't know how to title this post-  'Non-Traditional CraftRoom Storage and Workspace' was the best I could come up with-  because, basically- that's what this post is about-  storage and work surfaces from stores you don't usually think of when you think something like, "Where am I gonna obsessively sort and line up all the bottles of Dylusions?!"

If you're anything like me, the next best thing to blowing your paycheck on every new item fresh out of CHA is taking all the new product home and 'PROCESSING' it...  You know what I mean- to 'process' your new craft supplies-  you take off the price tags if they're covering up the nice packaging art, you remove any plastic shrink wrap from paint bottles/mists so that they're ready to go when you're in a rush of inspiration, you keep the embellishments in their packaging but sort and organize them into their appropriate storage area... That's PROCESSING! 

But sometimes, when you buy a bunch of new product, you decide it's just too purty to go into that old Dollar Tree bin and you need to upgrade to a bin from Dollar General.  Or, if it was a Kory-style shopping binge, you just need MORE STORAGE.

SO: Where to get great storage?  At Michaels, their beautiful, all-white storage bins look great- but even buying one section a day with your 40% off coupon (if they're not already ALL 40% off, that is) it's still going to take a dent (or obliterate) your crafting and entertainment and pharmaceutical budgets, combined!

I know it is not a BRIGHT NEW IDEA to pick up storage or storage ideas from non-craft related shops- but still, I'd like to share with you some of the great ideas that I've come up with or come across-

First up- the spinning and organizing wonder that's taken the craft world by storm:  Harbor Freight's Revolving Four Tray Bin .


This curvaceous beauty probably caused quite a bit of wonder to Harbor Freight, once it hit Pinterest and crafters descended on bewildered employees, crying, "WHERE IS THAT BIG CHEAP SPINNY CRAFT THINGYYYYY?!"

They only had one left on the floor when I made my trip to Harbor Freight.  They were also confused as to why they were almost all gone.  Luckily, a helpful employee found one in back for me.  And let me add- this helpful employee was a woman.  The first employee I asked, a man, sort of grunted and scratched half of his body before telling me, "If it ain't there then we're out." 

Luckily, I remembered my Mom's helpful advice, "If you really need something done, ask a lady." 

If you're not happy with the black steel color, as I am, you could always do what many other great scrappers have done and cover it with different washi tapes! 

Here's the now famous spinning rack in my craft room, in a very rare clean and fairly organized state:


How handy is that rack?!?!  I know, I know.  See that giant Martha Stewart cutting mat, under my nonstick craft sheet?  I found that at Big Lots for 3.99.  I saw it in Michaels, later, for over fifty bucks. 

Speaking of my own craftroom organizational work, let me introduce you to my pegboard.  Not just any pegboard, but the less than ten bucks pegboard.


Growing up, my genius and very artistic father had an incredible workshop and woodshop- filled with every tool and machine you could imagine- and everything was organized in labeled bins and walls of pegboard with a hook for everything.  So I've always had a love for pegboard.  It just looks so damn sexy when things are hanging from hooks.  It looks even sexier if you have enough pegboard to hang new product from- so that after a few cocktails, you can gaze through a boozy fog and pretend you're standing in the middle of your very own scrap STORE and then the doorbell rings and you don't remember ordering more product-  okay, sorry, enough of my sick and twisted fantasies.

How'd I make the pegboard?  I went to Lowe's.  I picked out the pegboard and found pre-cut 1x1 boards that were of the same measurements as my board.  Once I got home, I nailed (with tiny black nails) the pegboard to the 1x1s, to provide both stability and a surface to attach hanging hardware.  When I was done attaching the board to its 'frame,' I decided that, until I make two more pegboards, I'll just lean it against my wall.  It's secure enough, so I'm fine with that until I'm able to complete my 'triptych of pegboard organizational wonder.'
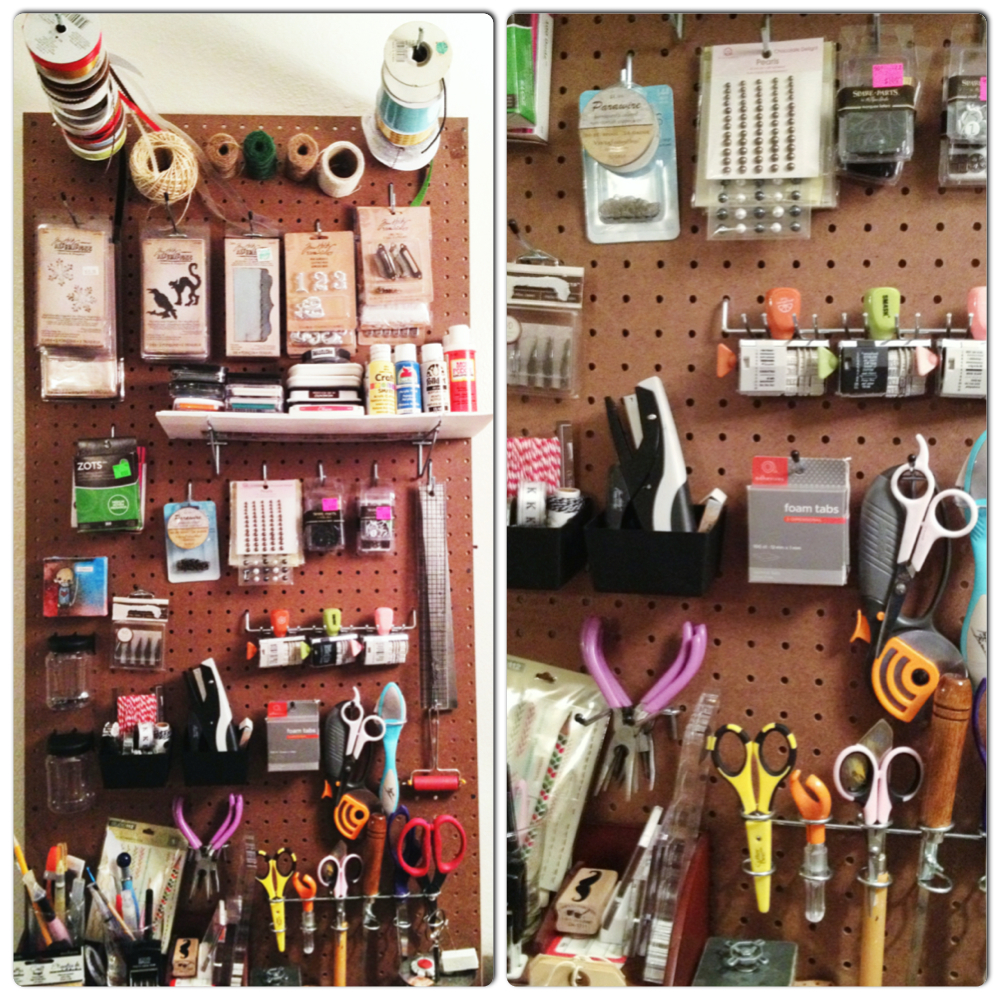
There's some close-up 'action shots!'  See that collection of roller date-stamps?  That's sick, isn't it?  Just plain sickening.

What are some other hot items, you ask? 

There's the RASKOG from Ikea.  You've probably seen it pop up on a few blogs.  It's hot.


Another thing from Ikea, that I spotted and thought would make a TERRIFIC workspace surface, especially for someone with limited room that needs all the space they can steal- the VIKA VEINE:

The top lifts up!  Space to work on and space to store AND/OR work on- you pick!  The VIKA VEINE is priced at 79.00. 

Back to HARBOR FREIGHT, now, for what is probably my favorite of all and the one worktable that's sure to end up in my space, ASAP IF NOT SOONER.  Check out this wonder:


Classy, huh?  PEGBOARD!  LIGHT! TWO DRAWERS! STORAGE SHELF UNDERNEATH AND TOP!!  Most of all, the biggest turn-on:

OUTLETS!  Perfect for your heat gun, your iron, electric die cutter- whatever, I'm sure you can imagine what an outlet could be used for- but, the possibilities!!!  Best of all, it's 99.99.  And Harbor Freight often has coupons and sales that can make you weak in the knees.  If you're into that kinda thing.

Another worktable option, which I spotted in a coworker's catalog this morning, The 'Outdoor Multipurpose Bench,' from GINNY'S.


This one has plenty of flat storage surfaces, looks lightweight enough visually- and isn't too bulky.  Also, I hear it's sturdy.  AND- check out the built in paper-towel holder!  It's a bit more expensive than the others, at 159.95.  Who knows, maybe it'll go on discount or maybe you just don't care- but you can see more at Ginny's.

Well, that's it for what I've got- what about you?  Seen anything I need to know about?  Let me know!

-kory k

Friday, February 22, 2013

Encaustic-esque Good Times!

Last summer, I was so freakin' lucky to attend a class taught by Dina Wakley.  It was life-changing.  No, not becuase I burned my finger.  Because I REALLY learned things.  A ton of thing.  Yeah- a TON.  You know you love it when I exaggerate.  But I'm not this time- it was a TON of things...

The class was her 'Encaustic Tag Book' class, which I read (I think?) that she recently taught the class for the last time.  So if she taught this class near you, and you didn't take it- well, I hope you know how sad that is...

From the sound of the word, I thought 'encaustic' would surely involve some kind of toxic chemical- possibly some kind of explosive.  But it doesn't.  You know what it means?  Good.  Tell me.  I don't know, and I'm too lazy to research any further.  Just know:  it involves wax.  No, not that way, filthy pervert.  And no, not that way, either, Chewbacca.

From the bit of 'research' I did do- there's lots and lots of encaustic-ness going on-  there's painting, and there's collage... and.. well, collage is where I'm interested.   Also, while doing this 'research,' I came across this disturbing line:  "About a year ago, R and F came out with an Encaustic Gesso- it doesn't smell as bad as rabbit skin gesso."

WHAAAAT?!?! GESSO IS MADE FROM RABBIT SKIN?!

Immediately, my life flashed before my eyes-  I see each and every moment I've worked with gesso.  I see each and every moment that I've stuck a finger in my mouth to get a bit of Mother Nature's natural blending solution (saliva) and rubbed my fingers all over the RABBIT SKIN.

Just as a co-worker began to rush to my screaming side and offer assistance, I finish reading:

"rabbit skin gesso...and unline ACRYLIC gesso....."

Whew.  That was a close one.  I know for sure that my gesso is acrylic.  I remember seeing that on the bottle.   But WHAT sicko learned that gesso could be made from the skin of adorable little Peter Rabbit?!  Or all the Cottontail bunnies?!

Anyways.

I've somewhat adapted the way I do my encaustic collage and, mostly- it really is just the same.  Don't copy me- as it could be dangerous.  And when the firemen pull the one household object that survived your fire- don't say "BUT KORY SAID I COULD USE A 10.00 IRON FROM WAL-MART TO DO IT!"  Because I didn't.  And if your Mom didn't teach you not to jump off a bridge just because Kory does it, well, you deserve what you get.

Now that the disclaimer is out of the way, here's my latest, Miss Dina-Inspired project- 

AN ART JOURNAL PAGE!


Upper left:  Here's my 'altered book/art-journal in progress.'  Most of the pages have white paint randomly smeared across- and left, there's some blue Dylusions that soaked thru...

Upper right:  I began by tapping my Barn Door and Broken China Distress Paints on the upper part of the page.

Bottom left:  With a mini-mister, I spray the page a coupla times.

Bottom right:  Take an old Wal-Mart gift card and smear your paints down, across the misted page.

I decided to add a bit more color- so I add some MUSTARD SEED Distress Paint.  I LOVE DISTRESS PAINTS- aren't they bottled gifts from heaven?!  Yeahp. Just like vodka.

Then it just looked WAY too bright- so I add some white acrylic paint.  I smear it on with the gift card, too, and scratch part of it away with the corner of the card.  Colorful, isn't it?  It's my latest painting, "Muppet Steamroller."

Yayyy!  Misting!   I used two different number masks from The Crafter's Workshop, and two shades of DYLUSIONALS to mist some numbers on top.   With a borders mask, I add the two brown strips at the bottom- the triangles and the diagonal strips.  I've also added some Tissue Tape.


I picked out two stamps I like and stamped them onto tissue paper.  It isn't fancy tissue paper or anything- just Dollar Tree tissue paper.

Okay- here's where it gets dangerous.  Now, you SHOULD be using an encaustic iron or at least one with a thermostat.  Also, you should be using beeswax- not just a candle you pulled out of your emergency or earthquake kit.  But anyways, if you're anything like me, you will turn a blind eye to any and all safety precautions.  I got a ten dollar 'travel iron' from Wal-Mart.  I rub my candle on it's hot little bottom and then press it to my page.  This puts a layer of wax ONTO the paper.  It's magical. 


Press your tissue paper onto this wax and burn your fingers.  THEN- take your iron and rub the candle onto it again- and this time, iron the wax OVER the tissue paper.  See that?  The tissue absorbs the wax and it's embedded between the layer of wax under it and the layer now over it- and the tissue disappears, leaving your stamped image sort of floating.  It is a beautiful look. 

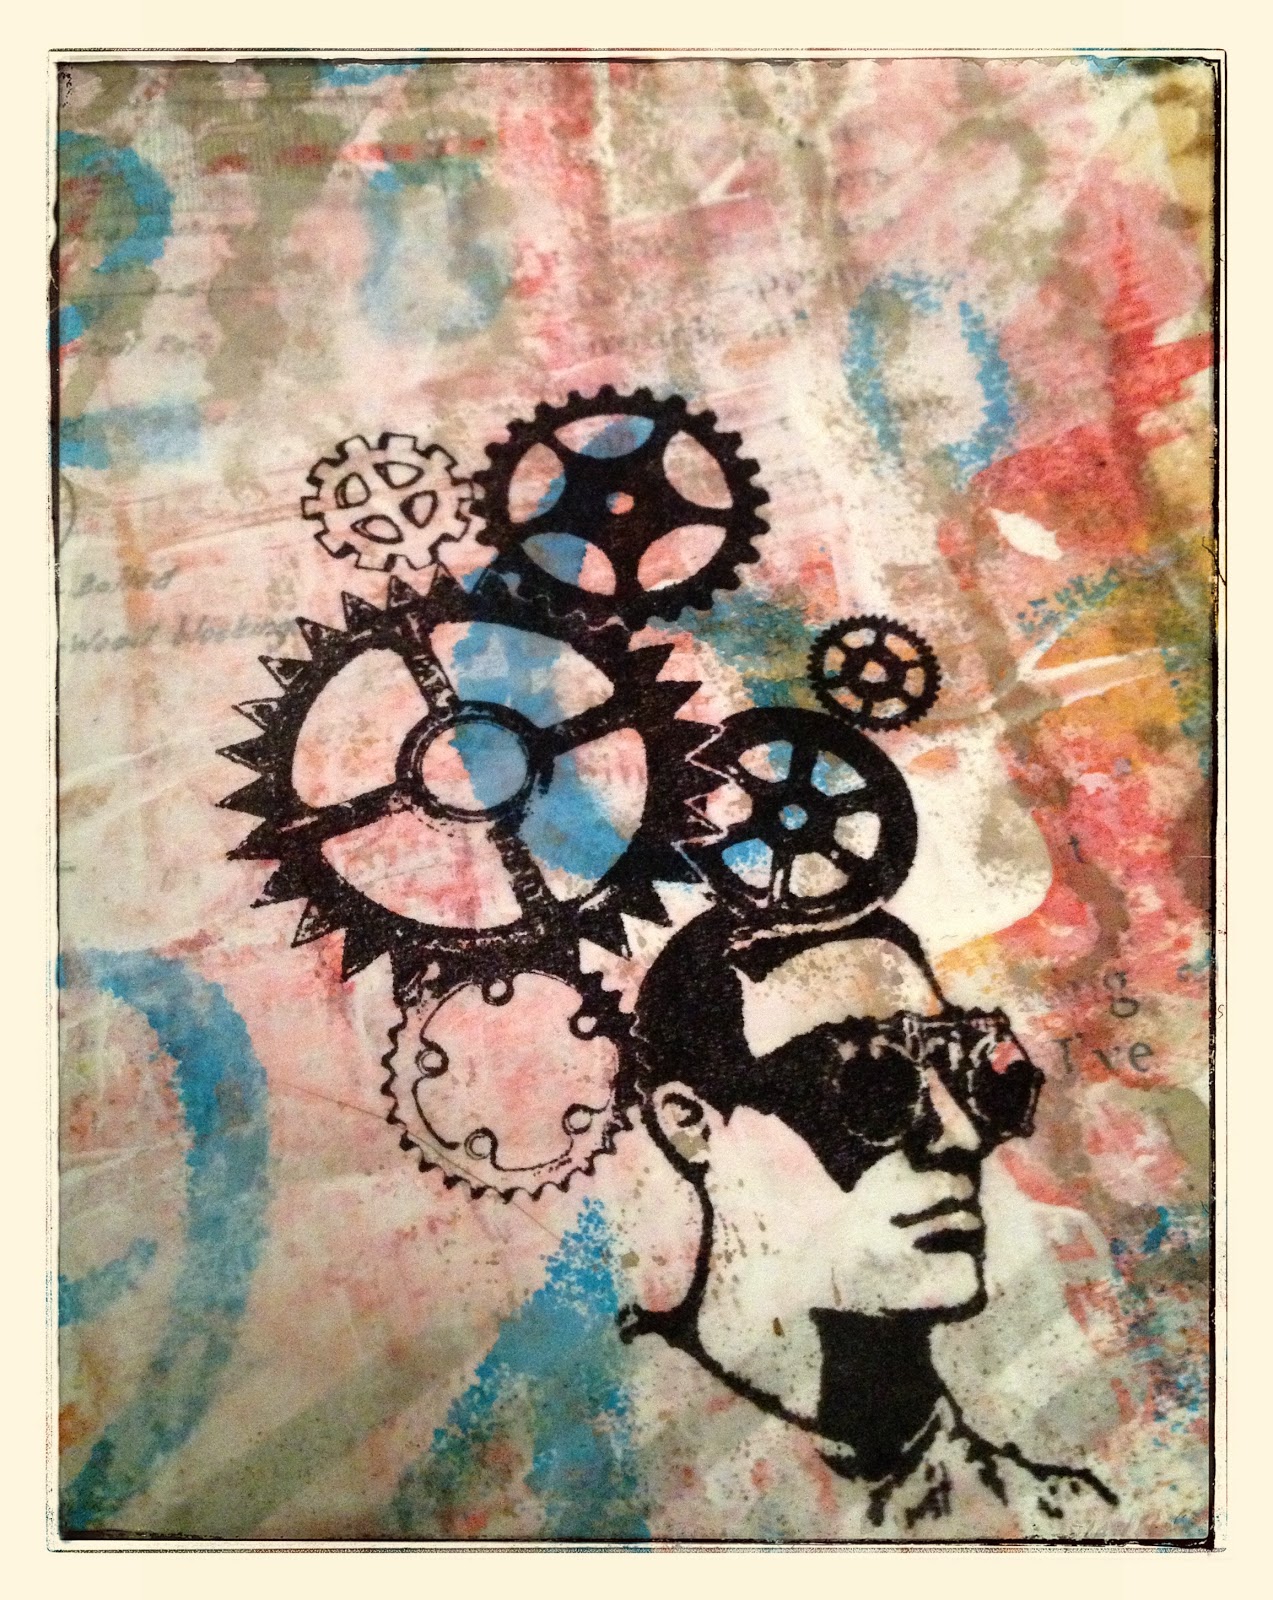
There ya go!  My finished page!  I added a sentence of lyrics, too.  I love it- fun and pretty.  And, for me, VERY colorful.  I'm as happy as a hooker in Vegas.

But why wax the tissue paper onto the piece?  Why not just stamp on it?  You have to see it in person, really, to properly get the full effect.  The wax softens everything and provides incredible depth.  Also, just stamping on those layers of paint, the image just wouldn't look like it does here-  see:

See that?!   Beautiful!

Okay- I've gotta get going.  I've got work to do, I can't just sit here and talk to y'all all day long!  Dang!

-kory

Thursday, February 14, 2013

Happy Valentine's Day!

Why HELLO!   Hap-hap-HAPPY Valentine's Day!

I'm in such a good mood, today.  Why?  I don't know.  Maybe it has something to do with all the sugar that's pounding through my veins, thanks to all the candy that people have left on my desk.  Or from the cupcakes that Miss Marie made...  Or from the pure sugar I've eaten, straight from the packets at the coffee machine. 

I love Valentine's Day.  Even when I've not been 'in loooooooove,' I've loved Valentine's Day.  Remember when we were little and pronounced it as 'VALLEN-TIMES?'   I love that...  Every time I hear a little kid say 'VALLEN-TIMES,'  a piecet of my heart thaws. 

I miss having a party in school, making a Valentine's mailbox, and passing out those cheap grocery store cards in the flimsy envelopes.  I remember thinking somebody was really cool if they were able to talk their Mom into springing for the cards that came with suckers to stick through slots in the card. 

Oh I love memory lane.  I'm usually drunk driving down it- but today, I'm on the sugar high express. 

Anyways.  As fond as my memories of cheap grocery Valentine's are- I still enjoy being 'grown,' and making my own cards.  So here's a selection of some of the many different cards I made for this year!


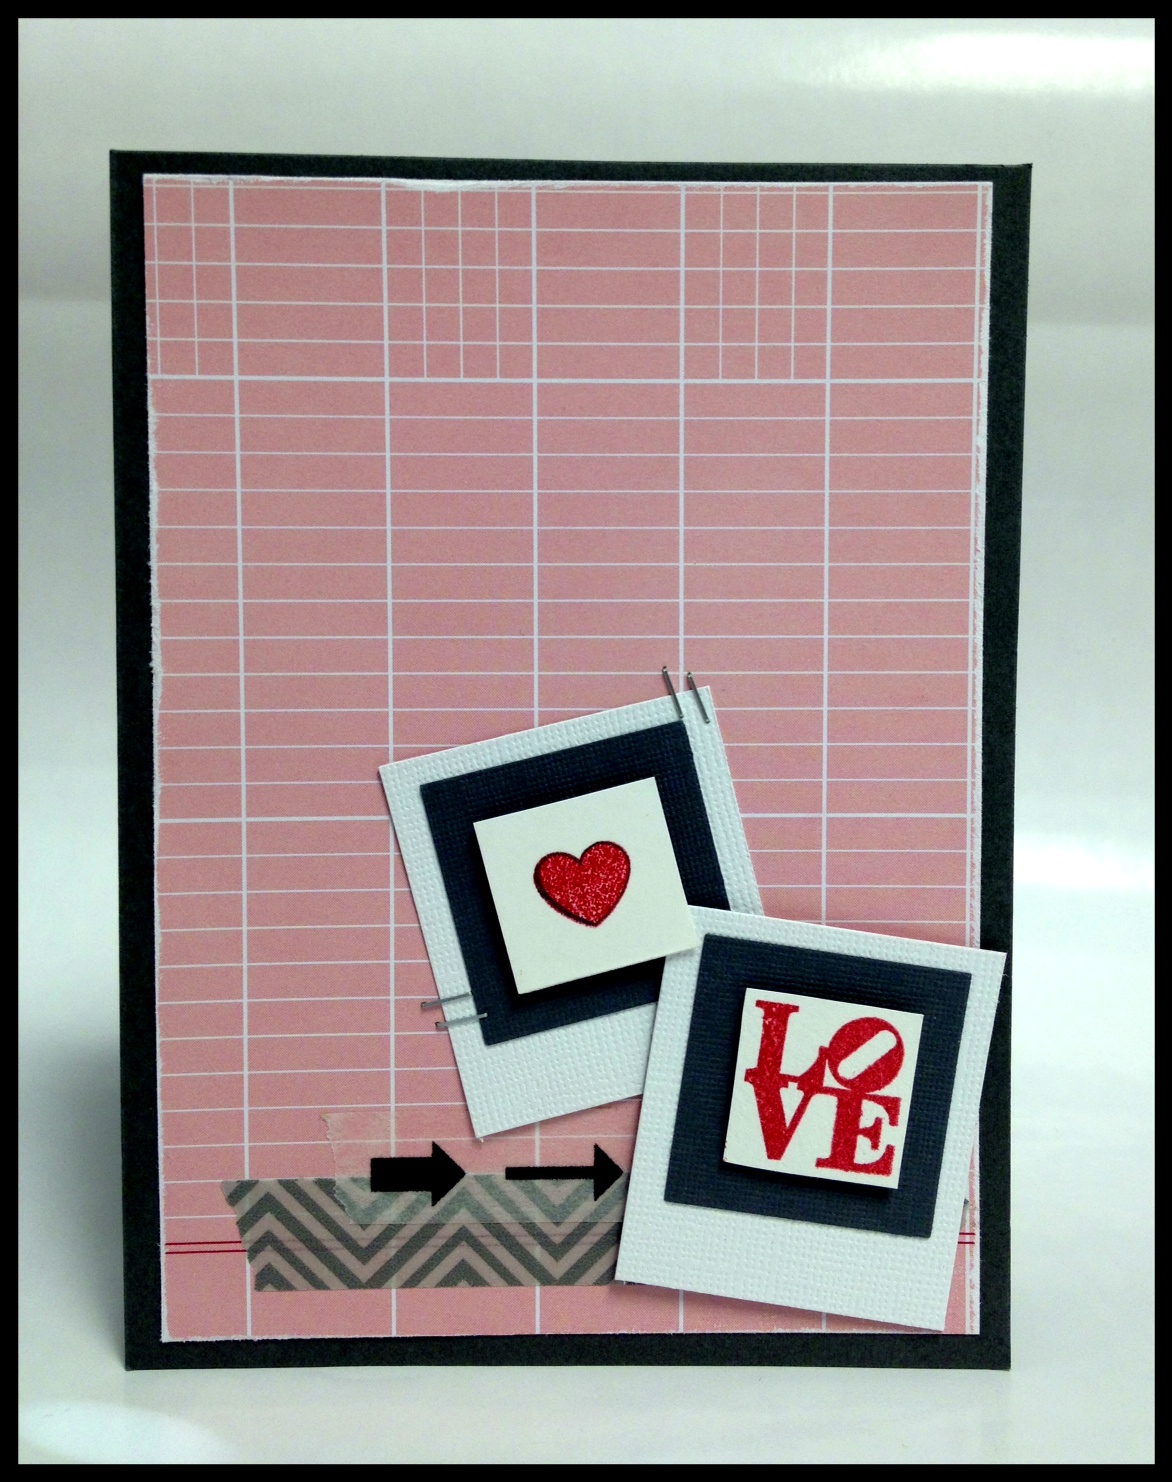
I loved making these faux polaroid shapes, using a square punch (for the dark gray paper) and my paper trimmer to cut the white rectangle.


Mist!  Masks!  Washi!  Die cuts!  Stamping!  Wow- how many techniques can I squeeze onto one square card?


If there's anything cooler than all these date roller stamps that these companies release every 15 minutes, I don't know what it is...


This one, above, is very simple.  I cut a scrap square of paper into strips on the paper trimmer.  Stuck them on, put a strip of washi (which I'd also cut in half!) and topped with a stamped and cut-out image.  The stamp was from the dollar bin at JoAnn.  How cheap was this card?  Scraps!  Washi cut in half lengthwise!  Dollar bin stamp!


I got the new blueprint Valentine's stamps from Mr. Holtz/Stampers Anonymous and had to play around with the famous 'wrinkle free distress' technique.  I LOVE playing with Distress Inks on my craftsheet!  I just feel like such a pro, misting the ink with water and smashing the tag down!  Sometimes, I even pretend to be Tim Holtz, and say to Holly, "Remember! Distress is reactive with water!"


Aaaaand on the last card that I've got to show, right now, you can see where I played around with my Distress Markers, coloring a couple of stamped images.  I love Distress Markers.  Has there ever been a more perfect marker?!  No.  There hasn't.


If I can manage to snap more pics of the cards I've made, before I head downtown to the theatre tonight, I'll post them-  final weekend of CRIMES OF THE HEART!  Come on downtown and see the show, if you're in town!  Next up:  Tracy Letts' BUG.  

Lots of love and HAPPY VALLEN-TIMES DAY!

-kory k

Wednesday, February 13, 2013

Altered Books and Art Journals and Random Artastic Fun

SO-

I recently began runnin' around with a new altered book club over at one of my favorite stores in town- Paper Crown.  We meet the last Wednesday of every month.  I had a great time at the first night, last January 30.  I had such a great time, that I can't wait 'til 27FEB!

At the class/club/whatever we're calling it, we each brought an old book.  We passed our books to the left.  We took the other person's book home and 'did a page.'  When we return, we'll pass our books again and continue.  I can't wait to see all the things that people will do to my book!

First of all- if you're one of the fun people from the class-  DON'T READ further!  Or look at any pictures.  You'll see it all on the 27th.  Okay?

I'm sure that ANY person reading this blog would know what an 'altered book' is- but just in case you don't, I'll try (my best) to explain:  

An altered book is a book that you alter in some way and/or many ways.  No, I'm not being smart.  You just....alter it.  With paint. Or collage.  Or saliva.  Or however.  Usually all of the above.  

I love the look and feel of an old book.  And a worthless old book (yes, they exist) that's been painting and glued and filled with interesting things- well, it's amazing.  And I had so much fun doing the page in the other person's book, I had to grab another old book and start a private/personal one, all for myself.

We were given 'Hearts' as our first theme, due to Valentine's Day.  Here's my very first page:


There is lots of stamping going on up there...   First, I 'glued' a few pages together on each side with gesso AND painted over the pages with more gesso.  I used the Kaisercraft 'Graffiti' stamp all over the page, stamped at alternating angles, to cover the pages.  Then some more randomly smeared gesso on top.  I cut the heart shape in the center out, except for a center hinge.  I painted the pages behind the cut pages with red paint.  Which, as pretty as red is, tends to always look like splattered blood.  I glued on a cut-out King and Queen of Hearts from a deck of Dollar Tree playing cards (I'm not ruining my classy deck of cards from Tiffany's on an altered book.  Not yet, anyways.) and stamped a crowned lion (from the dollar bin at Michaels) in the bottom left corner.  I found the wings at The Graphics Fairy.  If you aren't obsessed with the Graphics Fairy, I don't know what's wrong with you. 


There's a close-up on the crowned lion stamp.  Ain't he cool?  You can also see some of my random Distress Stain and penciled handwriting. 


There's a final shot, sideways- hoping it would show off the 3D aspect of the heart, folding out of the pages.  I don't think you can see in any of the shots, but I used some metallic Distress Stain to 'gild' the edges of my layout.

NEXT:

Since I work with Miss Chris, who is going to the altered book club with me-  we decided to 'trade' peoples books and do another layout before it's time to go back.  I wanted to do another heart page- and since this book belongs to my friend, Darla, I wanted it to be pretty cool:


Dangit.  Since I went with such a monochromatic look, here, you can't make out most of it...  I finally had an excuse to use my new Tim Holtz WORD PLAY die, to cut 'and love' from some chipboard.  There's some Mister Huey's splattered over my white and beige painted pages.  The heart is another freakin' cool find from The Graphics Fairy, and the penciled handwriting is lyrics from one of my favorite songs (Midnight Radio) from one of my favorite musicals (Hedwig And The Angry Inch).


The 'LOVE' stamp is from the dollar bin at JoAnn.  You can see some of Mr. Holtz's tissue tape peeking out on the right, there, too.

Have any of you altered a book or art journaled?   Show me!  I'd love to see!

-k

Thursday, February 7, 2013

I promise, I've not deserted you...


Just as that picture illustrates the pain, horror, and sadness I feel when forced to do my own laundry; I hope it also serves to prove the  pain, horror, and sadness of being away from YOU!   Yes, YOU! 

I swear-  I haven't been laying on the couch, watching old movies on Netflix.  I promise, I haven't been wallowing in piles of patterned paper while performing obscene acts with my Cricut Expression 2.  I'm nothing but honest when I say that I haven't been squirting Glossy Accents on my body while fondling my Sizzix BigKick. 

I've been busy.  At first, I just intended to take a short break for Christmas.  Next thing I knew, I was deep in working non-stop.  I'm stage managing another play, CRIMES OF THE HEART.  It's been long hours of hard work, but the show (finally?!) opens TONIGHT.  Well, it previews tonight and officially opens tomorrow.  But you know what I mean.  After this weekend, my life will slow back down to its normal post-opening speed and I'll have more time to both craft AND blog (and work and work and work). 

In the meantime- I'll leave you with a preview of KORY K's SCRAPIVERSE VALENTINE'S DAY CARD COLLECTION.  Yes!  I've been making Valentine's at any spare minute that I can squeeze thirty seconds out of...


It's a ZOMBIE VALENTINE!!!

A bit of background:  While home, sick, on a cold gray day not too long ago-  I was looking for something to make.  I stumbled across an incredible blog about Scherenschnitte.  Have you heard of that before?  I hadn't.   But I had seen images of these incredible paper-cuts, before.  I was hooked and before long, had read through to the blog's beginnings.  And before much longer, I was printing out the sample templates to try papercutting, on my own!  I printed my first template, put a fresh blade in the Exacto and sat down at my prized giant-sized Martha Stewart self-healing cutting mat. 

About fifteen minutes later (I obviously picked the easiest looking template I could find, for my first attempt) I had a really impressive (for what was such a simple template) paper-cut.  Scherenschnitte away!  I found a much more crazily difficult template.  About two hours later, I had an amazing looking piece and I was hooked.  All I wanted to do was to sit around, slicing through paper.  But more about all that, in a dedicated post.  Dangit, I can ramble.

Anyways- The ZOMBIES template was from this wonderful blog.  I cut out a zombie.  Printed the sentiment on some white paper.  Inked the edges of everything and stuck it all together.  A pretty simple, but fun card!   Go to SCHERENSCHNITTE, and get addicted.

Soon, I'll be back with MORE VALENTINE'S DAY CARDS, more fun from the set of CRIMES OF THE HEART, my belated 2012 ROUND-UP O'FUN, and an exciting feature that will be sure to leave you breathless... as you question my sanity.

-kory k

Monday, December 24, 2012

It's Christmas Eve!

Good morning, everyone!

It's Christmas Eve! 

Aaaaaaand:  I'm at work.  Sitting in the office in a close to empty building.  Wondering why I'm here-  I'm not doing anything except 'playing.'  I've been entertaining a few coworkers with jokes and stories.  I've been designing layouts on my brand new graph-paper-pad (Thank you, STAPLES!) and a bit of coloring some images I stamped on cardstock and brought to work with me-  so all in all, it's pretty much like I'm a pre-schooler sitting in an office. 

A moment ago, I was taking a trip down memory lane in my little lounge act on a file cabinet that I perform, daily, for coworkers.  I picked up the big plastic spoon that I use as a 'microphone,' and was remembering one of my favorite Christmas presents.  I was 11 years old.  It was a PXL-2000 from Fisher Price.

Do you know what a PXL-2000 was?  It was a little movie camera made for kids.  It recorded sound AND VIDEO onto normal little audio-cassette tapes.   You do remember cassettes, right?   Well, it could record about 5 or 7 minutes worth of sound and video on a 90-minute cassette tape.  The footage came out black and white, and fairly grainy.  But to a kid, it looked amazing.  I had my own CAMCORDER! 

You gotta Google it to get the full idea, if you don't know what I'm talking about-  I just did, to see pictures of it- and wow, even seeing a picture of the BOX brought back a heap of good memories.  And now I see that the format has been 're'adopted by filmmakers, using the cameras to create weird little movies.  There's even been film festivals devoted to short films made on the little toy camera.  Oh what I'd give to still have mine!  (If I remember correctly, it finally stopped working after much, much use...)

I've gots three more Christmas cards to share, today.  I can't say I won't be back tomorrow with more Christmas cards- I've just grown so addicted to making them.  I don't know what it is...  I've never loved making Christmas cards more than I have this season.  (And I've been making Christmas cards since kindergarten, when I sat next to a kid who would try to eat all of my paste.)


Up first is the card that I made for my great friend, Carolyn.  She's such a classy lady that I tried my best to make a classy card.  I used papers from the My Mind's Eye ALL IS BRIGHT 'Accessories Pad.'  The cream and deep red background has been one of my favorite papers from this pad and I'd been dying to use it- but it was bigger than any of the card bases that I had laying around.  I didn't have the heart to cut it smaller, so I made an A7 card base with a 12X12 sheet of thick kraft cardstock.  With the matching ALL IS BRIGHT stamp set, I stamped the '12.25.' pennant with Iced Spruce Distress Ink and cut it out.  I embossed a strip of kraft cardstock (left over from cutting the card base) with the chevron border strip embossing folder from Cuttlebug.  I layed a couple of pieces cut out from other pages in the ALL IS BRIGHT pad and layered them on with the stamped pennant and topped with a brad from the 'Decorative Bads' pack. 

Normally, I don't buy SO MUCH of one set.  Yeah, I did buy nearly two complete sets of BasicGrey's CLIPPINGS, but that collection was too great to NOT buy two sets!  But it seemed as if I had the entire ALL IS BRIGHT line sitting around!  Then I remembered- when I was at the Creating Keepsakes Convention last summer, I bought a very nicely priced package of stuff, just to get the three rolls of washi tape- and it had the rest of the set in there, too!  All for 7.00! 


More KRAFT!  I'm sorry, I don't know if this love affair will ever end.  No, no- I'm NOT sorry.  I love KRAFT and I'm PROUD, dammit!!! 

I used the Studio Calico 'Wonderland Star' pattern mask and Mister Huey's 'Calico White,' to spray the star background.  Then I just picked up random scraps and layered them on-  a dictionary page label cut from a Spellbinders set, a creamy cardstock I'd once cut out with the Spellbinders 'Lacey Circles' set, a pine branch left over from using Mr. Holtz's pinecone die...  I topped it off with my favorite HAPPY HOLIDAYS stamp over a stamped light gray chevron.  (I think I love that Happy Holidays stamp so much because of the font- doesn't that look great?!)


On my third card, I couldn't resist another of my favorite stamps- the man with the crown and a circle around his eye.  I don't 'get' this stamp, but I freakin' love it...  I colored him a bit with some Distress Inks, layered on my favorite Happy Holidays (again: THAT FONT!) and two My Mind's Eye '12.25.' banner stamps.  The retro-ey looking snowflake is from QuickKutz.  When I was at Staples, yesterday, buying anything and everything that caught my eye, I stocked up on blank tags, too.  You can't beat the price- a box of 500 for 5.97?!  Yes, please and thank you!  I stamped the tag with a woodgrain stamp (Stampabilities) and distressed it a bit.  The striped paper is from 7gypsies 'Postale' collection and the light blue paper that I used as a mat is from Carta Bella. 

I'm gonna try to get a little work done-  hopefully I'll get to leave early and go home to get ready to leave for my Aunt's home, for a little family Christmas party time. 

Merry Christmas and Happy Holidays, everyone!!!

-kory

Friday, December 21, 2012

Dear Santa...

While running thirty-six minutes late for work this morning, I started thinking about Christmas.  As we do at this time of the year. 

When I was a classy little kid, I made the best Christmas lists.  I had some software (remember when we called it SOFTWARE) called The Newsroom Pro for my DOS (remember DOS?!) computer.  For a good laugh- check out these screenshots I found when I searched for proof of my Newsroom Pro memories.  I mostly used The Newsroom to create crazily offensive and libelous newspapers to pass out at school, because I loved trips to the Principal's office.  However, when December rolled around, I stopped writing up accounts of what teacher was caught with what teacher in what room by what janitor and began making up my CHRISTMAS LIST.  In the style of a newspaper. 

To make a long story short, I thought it would be fun to make a Christmas list.

Some of the things I put on the list don't exist, I just wish someone would make them FOR me.  Yes, I'll be playing 'Creative Director,' for a bit.  Some of the things might exist and I don't know it- so if you say, "But Kory!  You CAN get that!"  And if you tell me where, I'd be so excited.  And some of it, it's just product I've seen online and obsess over, wishing I could make myself place an order.

1)  A "Whatever Happened To Baby Jane" rubber stamp and craft set.  Complete with a Jane stamp, a Blanche in her wheelchair stamp, a rat on a plate stamp and a two text stamps:  one that reads, "But y'are in that chair, Blanche!" and one that reads, "You mean all these years we could've been friends?!"  And a roll of washi tape printed with the sheet music for "I've Written A Letter To Daddy."

2)  A year of Studio Calico monthly kits.

3)  A "BAD SEED" rubber stamp kit.  One stamp: a close of little Rhoda making crazy eyes.  A stamp of Rhoda making one of her 'perfect curtsies.'  And a text stamp that says, "YOU GIVE ME BACK MY SHOES!"

4)  A Silhouette Cameo.  And someone to teach me how to use it.  I'm not kidding.  It took me forever to figure out my Cricut Expression 2.

5)  A Box Of Wine A Week Club.  I prefer Franzia's Crisp White.  I'm not proud or fancy.


So that's that.  My Christmas list.  It's PayDay Friday, too- so I'm a little more cheerful than usual.  Because it makes me so happy to pay bills.

Oh! Oh!  To make a "PayDay Friday" even BETTER- guess what the mailroom just delivered to me?!  A PRESENT!  I recently won a prize from Shelly Hickox, at her blog, Stamptramp.  Isn't that one of the greatest blog names ever?  I know.  She even WRAPPED the prizes and included one of her beautiful and genius tags.


I can't say thank you well enough or enough.  This is the only wrapped present (and possibly the only present) that I'll get for Christmas- so I'm doubly touched and ... just very thankful.  Thank you so so much, Shelly!!!  The tag is beautiful (beyond belief- you should see what it does when it opens) and I am gonna make something with the dies when I gets home!

-kory